Hello People, the ignition switch is used to power up vehicles. It is responsible for creating sparks bursting your engine to life. So, without further ado, let’s see wires going to the ignition switch.
Quick Navigation
What Wires Go To Ignition Switch
The ignition switch ignites the fuel once you slot your keys in; multiple components work in sync to make that happen. That makes it almost impossible for an ordinary person to know even the slightest thing about the mechanism of the ignition switch. When you suspect something is wrong with the ignition switch not letting it start, it becomes necessary to replace it.
Replacing the ignition switch isn’t exactly uncommon. It is one of those parts which can unexpectedly deteriorate and weaken due to excessive usage, age, and a bit of both.
Wiring it all in is the most complicated aspect of replacing the ignition switch. You might have seen cars being hotwired in movies before. There are numerous wires and cables intertwined underneath your car. Knowing what wires go to the ignition switch is the key to keeping your ignition system running perfectly.
Parts of Ignition Switch Apart From The Wires?
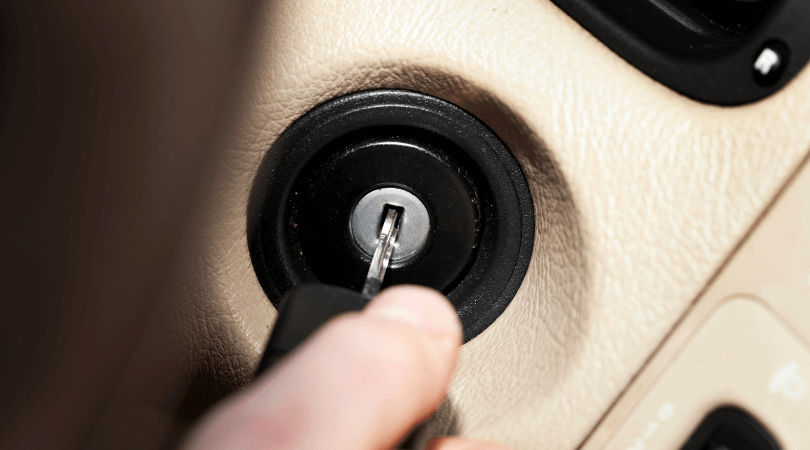
Keep in mind that the ignition system is comprised of two components – An ignition switch and a lock cylinder. Most people correspondingly use both parts, even though they both have differing purposes. Knowing the difference between the two is essential to improve your chances of meticulously fixing the ignition. Buying and fitting in a wiring component will exacerbate things even further.
Switch:
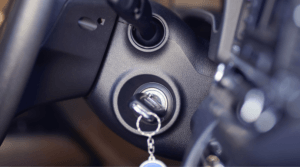
The subject of our article, The electronically controlled ignition switch is placed within the steering column or dish. The ignition switch sends electronic signals to the car’s computer, letting you control the entire system by slotting and turning the key.
Lock Cylinder
The lock cylinder extends beyond the dashboard or steering column, where you can slot and twist the key. They are fast becoming a thing of the past as new-age cars are featuring keyless ignition systems, meaning that you don’t require a physical key. Here, a wireless signal will be sent between the key fob, and the immobilizer will authenticate you as an owner. Then, all you have to do is press a button to boot it up.
In conclusion, the sole job of the ignition switch is to simply turn the car on and off. It creates an interrelation between the critical components in your car, be it the starter motor to turn on the engine or your in-car gadgets to the battery.
Position of Ignition Switch That You Can Turn to
If you take a glance at the exposed part of the ignition lock cylinder, where the key is slotted, you will notice some lettering. These indicate the various states where you can turn in the ignition switch. For instance, you want to turn on the air conditioning but keep the engine off. Sounds interesting, right? Well, this is how it works. The key locks into different states, allowing you to do other things.
First Position
Position 0 (LOCK or OFF): The only purpose of this position is for you to let in the key safely. Simply put, it doesn’t influence your car’s ignition or electronics. Avoid turning the key clockwise into another position to keep the car in the same state. When you want to remove the key from the slot, turn the key back to the LOCK or OFF state. If not, the key will stay locked as it is.
Second Position
Position I (Accessories): This is the secondary mode of driving a car; here, you connect with the car’s electrical and electronic accessories. However, the engine stays off, but you can surely enjoy the car’s amenities. It can be anything that requires electricity to function, from the multimedia system to the heated seats, lights, power windows, etc. Remember that using all the amenities for pronged time will drain the battery.
Third Position
Position II (Ignition): This position prepares the engine to be ignited while simultaneously turning on all the electrical accessories in your car. It may also include turning on the fuel pump to flow the fuel into the engine.
Fourth Position
Position III (start): When you have decided to go for a ride, you would turn and hold the key in the START position to heat up the engine. Now car starter has to do the rest of the deed by inducing a tremendous amount of voltage to combust the fuel-air mixture in the engine. When the engine switches to running mode, the switch drags the key back into the ON position, shutting off the starter.
As we’ve learned about the ignition switch positions, let’s know about the wiring going through the ignition switch.
What Wires Go To Ignition Switch
First of all, the topic of wires for ignition switch is deep. You have to learn more to figure out what wires go in which car. Here, research more about your car. Unluckily, the ignition switch isn’t a universal gear, and some cars might have a more distinctive formation than others.
Your focus should be directed toward the function and location of each pin behind the ignition switch. As I said, some cars might have a different configuration; There are usually four pins. These respective terminals are often stamped as:
Generally, there are four positions where you can get the key. They are mentioned as follows:
- BATT – Battery; connects the ignition switch directly to the car’s 12V battery.
- ST – Starter; connects to the engine’s starter solenoid and is spring-loaded upon contact.
- IGN – Ignition; the primary and default terminal for vehicle ignition, accessories, and other electrical amenities.
- ACC – Accessory; connects to and powers your car’s accessories such as radio, lights, windows, etc.
How to Wire Ignition Switch?
Below are the steps you need to follow to wire the ignition switch on your own. However, depending on your car, you might want to have a push-button starter switch wiring diagram around.
1. Park Your Vehicle: Make sure your car is parked on flat ground before turning off the engine.
2. Locate the Terminals on the Ignition Switch: Look for the pins at the back of the ignition switch. You would find four terminals with marks like “BATT”(Battery), “ST” (Start), “IGN”(Ignition), and “ACC”(Accessory). What mark you will find depends on the car. It will be smart to go through the car’s repair manual to avoid mishaps.
3. Disconnecting the Battery Terminals: On the battery, you will find two terminals, marked as Positive (+)and negative (-). Disconnect the negative battery on the terminal. Make sure to loosen the bolt before removing the battery terminals. On the safety front, be mindful of obtaining the negative cable safety to prevent it from touching any terminals while working the ignition.
4. Scraping Away Clips from Steering Wheel: Remove any clip you find on the steering wheel. Scraping away the plastic clips and unfastening any screws and bolts is also necessary. After taking them off, keep them securely somewhere they don’t attain any damage.
5. Removing the Steering Wheel: Some vehicles have their ignition switch placed on the dashboard, while some have it equipped with the steering column. Disassembling the steering wheel is essential for this job wherever the steering wheel is located. Use a steer wheel puller if you can. Before doing this, you should go through the repair manual.
6. Free up the Hooks in the Ignition Modular Cover: Unlocking the hooks on the ignition module cover will allow you to remove the cover to access the ignition switch. You might see some releases on the clips. Use a screwdriver or pincher to scrape out the releases from the hooks.
7. Setting the Keys in the Right Position: Set the ignition key and turn it to the “accessory” position. As explained earlier, this will release your car from the ignition module. Some people suggest using a screwdriver, and you don’t have your car key, but I’m afraid I disagree with using a mechanical tool of any kind. Staying away from such tools is the best practice to avoid damage to your ignition switch.
8. Check The Ignition Switch: Look at the switch to see if anything is wrong. You will need a test light to do so. Depending on the OEM, the dealership from where you bought the car, and your requirements, you might need to repair the ignition or get a brand-new one.
9. Check the Wires: Check if the positive power of the battery is passing through the vehicle’s ignition switch. It is an easily noticeable thick red wire which is always electrified. Once you have recognized it, insert the right terminal end on the wire and keep it stable using a terminal multi-tool. Now, join the power lead to the “BATT” terminal of the switch.
10. Join the Accessory Wire: Join the accessory lead wire to the “ACC” terminal of the ignition switch. When the ignition switch is turned to the “ACC” position or Position I, the wire is necessary to burst your electrical accessories to life.
11. Connect the Starter Wire: Join the starter relay wire to the “ST” terminal of the ignition switch. The “ST” terminal only activates when the ignition switch is turned to the “START” position or Position III.
12. Connect the Ignition Wire: Join the ignition wire to the “IGN” terminal of the car’s ignition switch. The central terminal is the car’s ignition, accessories, wipers, and other amenities.
13. Reinstall the Ignition Switch: To install the new switch, you must apply some pressure on the release pin to place the new ignition. After that, You install the new ignition switch in the steering column.
14. Time For a Test: Let’s test our newly connected ignition switch. Let’s start with reconnecting the battery. Don’t start assembling parts or components until you ensure the new ignition switch is working perfectly.
Fit the key and try to turn the ignition to reconnect the detached negative battery terminal. If the ignition works fine, you have done a wonderful thing; if it is not, you must repeat the steps.
15. Reassemble the Car Parts: Once you have confirmed that the ignition switch is working just fine, next, we have to reassemble the parts (which honestly, I find to be super boring, but it needs to be done). Turn off the engine before removing the battery, as you did at the beginning of the process.
Assembling the parts, although not rocket science, can be tricky sometimes. Thus going through the car’s repair manual to learn part assembling is a good choice. Whatever you choose, remember to fit the right components in the right place using all the screws, bolts, and clips at your disposal, Just as suggested in the manual.
That’s it; if you follow these steps correctly, don’t think you should face any problems with how to wire the ignition switch.
FAQs

Below are the frequently asked questions on what wires go to the ignition switch to acquire some insights on essential aspects related to it.
Where does the ignition switch get power from?
The ignition switch gets power from the car battery and converts it into sparks capable of making duel vapor, starting the vehicle. However, that’s not all; the ignition system works in sync with many components controlled by the car’s internal computer system to start the car.
Does the ignition switch control the fuel pump?
The ignition switch provides power to the fuel pump and ignition system for a split second when it is in the cranking position, allowing the vehicle to start.
What are the signs of a failing ignition switch?
Your car will stall right after you start, or it may stall while driving. If the key is in the same position and fails, your vehicle is acceptable, but still, after some time. Either way, this can indicate a problem with the ignition switch.
How can I start my car without the ignition switch?
You can start your car without your key. Although, I recommend doing this only when you have lost your key and don’t have a spare one. To bypass the ignition system, you should connect the ignition cord to the battery cord, then contact the starter cord to the connection.
Final Thoughts
That was all I wanted to say about What Wires Go To Ignition Switch. The ignition system is one of the essential parts of a car’s system. Like all the other parts, they also get run down after prolonged usage.
Thus, a failed ignition switch can become a genuine inconvenience. The reason for writing the article was to empower you so that you wire your vehicle’s ignition switch whenever the need arises. However, getting a universal ignition switch wiring diagram is the key to not making any mistakes while following these steps.
Thanks for reading. have a wonderful day. Drive safely.