You’ll need to access the battery without cracking the housing, which means locating the tiny release slot and applying just enough pressure to split the shell.
Using the wrong tool or excessive force can strip the clips or damage the internal contacts, rendering the fob useless. Follow the precise steps ahead to avoid costly repairs.
Quick Navigation
Key Takeaways
- Locate the metal key release slot, press it inward, then pull the key blade outward to free the fob housing.
- Insert a thin flat‑head screwdriver or spudger into the rectangular release slot (≈3 mm × 5 mm) and apply gentle pressure.
- Twist the tool 15–20° to disengage the latch; the front and rear halves will separate with an audible click.
- Use a plastic opening tool to lift the old battery, noting the “+” side orientation before removal.
- Re‑assemble by aligning the clips, snapping the halves together, and testing lock/unlock functions to confirm proper closure.
Identify Your Hyundai Key Fob Model
How can you pinpoint which Hyundai key fob you have?
First, locate the series code stamped on the back of the fob—“U2‑A” denotes a 2015‑2020 Sonata, while “U2‑B” identifies a 2021‑2024 Elantra.
> Locate the series code on the back: “U2‑A” for 2015‑2020 Sonata, “U2‑B” for 2021‑2024 Elantra.
Next, read the metal blade for the model number—e.g., K‑Fob 2022‑02—and confirm it matches the VIN‑linked record to prevent misprogramming.
Inspect the PCB; a “Flip” label indicates a hinged flip‑style fob like the 2022 Tucson.
Identify the battery slot shape—rectangular for CR2032, larger for CR2450—to choose cell.
Finally, locate the tiny loop near edge; its presence confirms an NFC antenna and function, as on 2023‑2024 Genesis G70.
What Battery Does Your Hyundai Key Fob Use?
You’ll most likely need a 3 V CR2032 lithium coin cell, though some 2023‑2025 fobs require a CR2450, so verify the printed code on the old battery.
Check both diameter and thickness—20 mm × 2.5 mm for CR2032 or 24.5 mm × 3.0 mm for CR2450—to avoid installing an incorrect size that could damage the fob.
Always source the replacement from a reputable brand to guarantee the nominal voltage and prevent premature failure.
Common Battery Types
Because most Hyundai key fobs built between 2010 and 2023 rely on a 3‑volt lithium coin cell, the standard replacement is a CR2032 (20 mm × 3.2 mm).
You should also know that earlier 2005‑2009 Accents and Elantras use CR2025 cells, while premium 2022‑plus Palisades require CR2450 batteries.
These cells deliver 3 V nominal voltage, with CR2032 offering about 240 mAh and CR2025 around 200 mAh, supporting a three‑year battery lifespan under normal use.
Choose reputable brands or OEM‑marked “Hyundai” cells to guarantee voltage stability and minimize leakage risk that could corrupt the fob’s circuitry.
Inspect the compartment for corrosion before insertion, and verify correct polarity each time.
Identifying Battery Size
Having seen the typical CR2032, CR2025, and CR2450 options, the next step is to pinpoint the exact size for your specific fob.
First, open the fob carefully, avoid shorting contacts, and remove the old cell.
Read the battery markings; they usually read CR2032, CR2025, or CR2450.
If the code is absent, perform a size measurement with a ruler or caliper.
Match 20 mm diameter to CR2032, 25 mm to CR2025, and 24.5 mm to CR2450.
Newer Palisade or Santa Fe units often require the larger CR2450.
Using an incorrect size risks poor range or permanent damage.
Replace it promptly and verify remote operation.
Tools Needed to Open Your Hyundai Key Fob
If you want to open the fob without cracking the housing, gather the proper tools first. Choose a thin flat‑head screwdriver (2‑3 mm tip) or a sturdy coin for initial pry; both offer tool durability and an ergonomic grip. Keep a small plastic opening tool or spudger ready to separate halves without scratching contacts. Have needle‑nose tweezers for battery removal and a lint‑free cloth or an anti‑static mat to protect components.
| Tool | Purpose | Key Feature |
|---|---|---|
| Flat‑head screwdriver or coin | Pry seam | Durable tip, ergonomic grip |
| Plastic spudger | Separate halves | Non‑scratching |
| Needle‑nose tweezers | Lift battery | Precision tips |
Avoid excess force altogether.
Locate the Metal Key and Release Slot
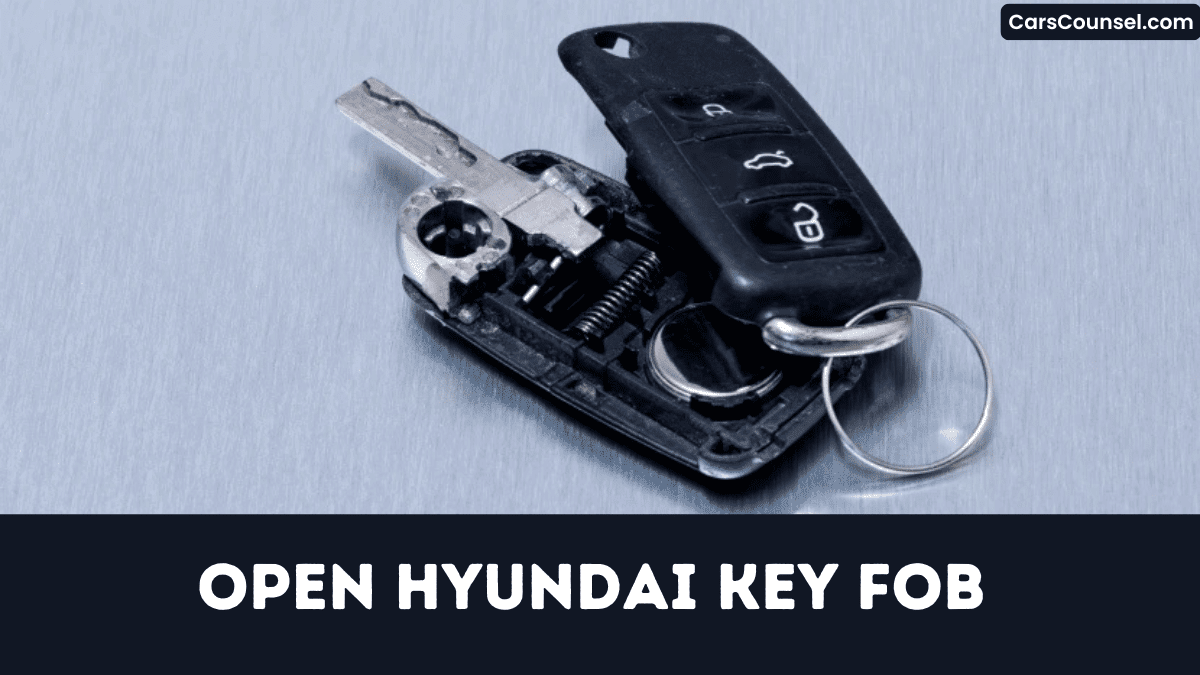
Grab the flat‑head screwdriver you set aside and turn the fob over; the metal key is tucked behind a small sliding latch near the top edge of the remote housing.
Press the latch inward and pull the key outward; it extends about fifteen millimetres, giving clear key visibility.
Beneath the blade you’ll see a rectangular release slot, roughly three millimetres wide and five millimetres deep, precisely aligned with the fob’s seam.
Observe slot positioning before inserting the screwdriver tip to avoid slipping onto the circuit board.
Apply gentle pressure, and the halves separate without damage, to preserve functionality completely.
Pry Open the Fob Without Damaging It
Pick a thin flat‑head screwdriver or a plastic pry tool that slips into the fob’s seam notch without forcing it.
Don’t exceed 0.5 kg of pressure; instead, apply a steady 0.3–0.5 kg force in 2‑3 mm increments, pressing on the plastic latch rather than the metal contacts.
Maintain alignment of the halves while you twist upward, keeping the spring‑loaded button and PCB seated and the clips intact.
Proper Tool Selection
How can you safely pry open a Hyundai key fob without cracking its ABS housing?
Choose a (≤2 mm) plastic spudger or automotive trim tool; its tool ergonomics keep your hand steady while its material durability prevents scratches and short‑circuits.
For newer fobs, insert the metal key blade into the slot, then lever the edge with a pry bar to disengage the clasp.
Older flip‑style units accept a U.S. dime or 20 mm coin, offering sufficient mechanical advantage and even pressure distribution.
Keep the tool perpendicular, slide it around the seam, and limit force to under 5 N to avoid fracturing the housing.
Gentle Pressure Technique
When you’re using the plastic spudger you selected, insert it into the seam and apply a steady 0.5–1 kg force at about a 30° angle, keeping the tool perpendicular to the housing.
Begin by pressing the metal key‑release tab inward, then slide the spudger along the perimeter, maintaining even pressure calibration on both sides for 2–3 seconds.
Watch for tactile feedback that signals the clips are disengaging; avoid twisting or exceeding 2 N at the notch.
Once the halves separate, hold them aligned, support the fob with one hand, and extract the battery without stressing solder joints carefully to avoid any damage.
Separate the Halves to Access the Circuit Board
If you locate the seam along the fob’s edge and insert a metal key or flat‑head screwdriver tip, apply roughly 0.5 kg of pressure to pop the halves apart; for newer Hyundai fobs, slide the metal key into the small rectangular slot near the bottom and twist gently 15–20° to release the latch, while older flip‑style units require inserting a coin or screwdriver into the side notch and prying upward with about 2 N of force.
Keep halves aligned for clip preservation; once a 1–2 mm gap visualizes, gently pry around the edge until the case clicks open and expose the circuit board.
Remove the Old Battery and Record Polarity
Use a thin plastic pry tool to lift the battery, keeping metal contacts away to avoid short‑circuiting the PCB.
You then photograph the cell, performing quick battery logging to capture its exact orientation before removal.
Observe the “+” marking on the flat side; Hyundai fobs typically position the positive side up toward the interior.
If the cell measures 20 mm by 3.2 mm, you’re dealing with a CR2032; a 24.5 mm by 5.0 mm part indicates a CR2450, and size mismatches can shift polarity alignment.
After extraction, place the old battery in an antistatic bag and apply polarity labeling to the bag, preventing future confusion.
Insert the New Battery Correctly
Because the fob’s contacts are designed for a specific polarity, you must seat the new CR‑type battery with the “+” side facing up, matching the printed symbol in the compartment.
Verify Battery orientation by confirming the 20 mm × 3.2 mm dimensions align with the cavity.
Use non‑conductive tweezers to place the cell, preventing oil transfer; if fingerprints appear, perform Contact cleaning with a lint‑free swab and isopropyl alcohol.
Press gently until the battery sits flush against the metal contacts, avoiding tilt that could cause intermittent connection.
Double‑check that the battery rests evenly before reassembling the fob.
Secure fob after confirming proper seating.
Snap the Fob Halves Closed
How do you guarantee a secure seal? Align the two halves so the internal metal clips on the front and rear edges achieve clip alignment, then press firmly with thumb along the seam until you’ll hear an audible click, confirming engagement.
Align halves, press until you hear a click, then verify a flush seam for a secure seal.
Verify the seam is flush around the circumference; any gap indicates a mis‑aligned clip that could reopen under stress.
If a metal key blade is present, re‑insert it before snapping to avoid obstruction and uneven pressure.
Finally, gently tug the fob from opposite sides to make certain the clips are seated and case will remain intact during normal use.
Test Lock/Unlock Functions Immediately
Once you’ve snapped the fob closed, press the lock button and verify that the doors latch within 0.5 seconds—you’ll hear an audible click and see the interior lights flash.
Then press release; the doors must open within 0.7 seconds, and hazard lights may flash.
Stand five meters away and repeat both commands; successful operation confirms range verification.
For proximity models, walk away and return within two meters; doors should lock or release automatically within one second, demonstrating response timing.
Finally, glance at the instrument cluster; the “Key Fob Battery Low” warning must disappear, confirming proper battery orientation and contact.
Troubleshoot Issues If the Fob Won’t Open
Why won’t your Hyundai key fob open?
First, inspect the seam for a hidden release tab; a 1 mm flat‑head screwdriver can depress the metal latch without damaging the case.
Make sure the key blade isn’t still inserted, because it locks the halves together.
If the case feels glued, perform adhesive softening by applying gentle heat (≈40 °C/105 °F) with a hair dryer for five to ten seconds, then use a thin plastic spudger to pry apart.
Clear debris from the hinge groove with a burst of compressed air.
Avoid metal tools to prevent scratching internal contacts, which could cause intermittent failures later.
Seek Professional Help If Needed
If your DIY attempts don’t restore proper function, you should contact a certified Hyundai technician who can diagnose transponder faults, antenna damage, or firmware issues.
Check whether the problem falls under the 5‑year/60,000‑mile warranty, because authorized service centers will cover faulty buttons, water ingress, or re‑programming costs within that period.
When you schedule service, request a written estimate and confirm that the shop uses OEM equipment to sync the fob to the vehicle’s immobilizer.
When DIY Fails
Although you may feel confident after swapping the battery, the fob can present issues that demand professional attention.
If the case won’t snap back, a technician will re‑seal it to preserve IP67 and avoid corrosion.
Persistent lock or open failures, despite correct polarity, usually mean a damaged PCB requiring professional repair, $45‑$70.
Forcing a flip‑style unit can snap the metal key release tab; the dealer replaces the housing (C10010000) for $30‑$45.
A lingering low‑battery warning signals re‑programming ($20‑$40).
Simultaneous loss of trunk, proximity or other functions often indicates a faulty transceiver; a scan may qualify for a warranty claim.
Locate Certified Technicians
When a DIY fix stalls, you’ll want to locate a Certified Technician who can properly re‑program or reset the fob.
Use Hyundai’s Dealer locator, enter your zip code, or call the Service hotline, and the tool returns authorized dealerships with trained staff.
These Certified Technicians access the OEM Hyundai Global Service Tool, the interface capable of re‑programming the anti‑theft transponder chip without damage.
If your battery replacement failed, they can perform a Key Fob Health Check within 24 hours to verify signal strength and programming accuracy.
Professional replacement costs range $30‑$60, covering a genuine CR2032 or CR2450 cell and labor.
Warranty and Service Options
Since Hyundai backs the key‑fob battery with a three‑year warranty, you’ll receive a free replacement at any authorized dealer when the cell fails within that period, while the fob itself enjoys a five‑year defect warranty that becomes void if you open it yourself.
Within that window, dealers program the fob at no extra charge, saving you $45‑$80 for battery service and $120‑$180 for full repairs.
Ask about warranty extensions or Dealer discounts before authorizing work, because out‑of‑warranty repairs incur full fees.
For non‑defective failures, Checkered Flag Hyundai World offers a 30‑day money‑back guarantee on replacement units with full support.
How to Open Key Fobs by Brand: Hidden Key Release, Battery Type & Case Separation
| Toyota Key Fob | Honda Key Fob | |
| Chevy Key Fob | Ford Key Fob | Jeep Key Fob |
| Subaru Key Fob | Kia Key Fob | Mercedes Key Fob |
| Audi Key Fob | Volvo Key Fob | VW Key Fob |
Frequently Asked Questions
How Do You Open up a Hyundai Key Fob?
You’re opening the fob by sliding the metal release, inserting a flat‑head screwdriver into the seam, and gently carefully prying the halves apart; then perform battery replacement and verify key programming before reassembly safely properly.
How to Open Hyundai Car Key Cover?
78% of drivers swap fob batteries within three years. You’re opening the Hyundai key cover by slipping a flat‑head screwdriver into the side slot, applying steady pressure, protecting cover material and ensuring key durability properly.
How Do I Pop My Key Fob Open?
You’re popping the fob open using a thin plastic pry tool; perform tool selection, apply gentle pressure, and follow safety precautions—avoid metal contacts, keep force modest, and snap halves together securely properly after battery replacement.
How to Take Apart a 2017 Hyundai Sonata Key Fob?
You’re taking apart a 2017 Hyundai Sonata key fob by prying the seam with a tool, releasing the spring mechanism, removing the metal blade, then performing battery replacement, handling the CR2032 carefully without excess force.
Conclusion
Now that you’ve swapped the cell, double‑check the polarity and reseal the shell with firm, even pressure. Like Daedalus threading his wings, you must handle each clip precisely to avoid breaking the PCB or shorting the antenna. Test lock and release functions immediately; if the fob glitches, re‑inspect the battery seat and re‑align the halves. Remember, a mis‑step can render the key inoperative, so proceed methodically and keep a spare battery handy for future replacements.